
First of all, what the heck is this 'setting the twist' business? Well, when a yarn is just spun and untreated the spin you have put in the wool might cause the yarn to twist up on itself (more on that in a minute). Setting the twist is the process of relaxing the fibers in the yarn. Really, 'setting the twist' is a misnomer, as what you're really doing is bring the fibers back to their natural state. If you have no idea what the heck I'm talking about, read on. The pictures will help, promise.
So how do you go from this (spun yarn still on the bobbin)

to this (treated and ready to be knit yarn)?

The first step is unwinding the yarn from the bobbin into a skein. There are (again) many ways to do this, sometimes involving expensive equipment, sometimes the back of a chair. I do it with my swift and lazy kate. I measure my swift to have a 54 inch (1.5 yards) circumference, and than I begin winding the yarn onto the swift.

After I've wound the entire bobbin (or two) onto the swift, I secure the skein by tying figure eights in two places (opposite one another) with scrap yarn, twine, or pretty purple hemp.

At this point you can take the yarn off the swift (chair back, skein winder, whatever it is you were using to make your skein). You'll want to use two hands at opposite ends of the skein, otherwise the yarn will twist on itself and you'll spend half an hour trying to find your bearings.

Remember how I was talking about

And then held tightly at both ends of the skein...

This nice and tight, flat yarn is what we're going for when we set the twist. The next step is to twist the skein into a hank.

While you're doing this step, fill your sink with lukewarm tap water (or if you're like me and too lazy to do the dishes, use a large mixing bowl). Place the hank in the tap water, squeezing gently to allow the water to penetrate the entire length of the yarn. Then drain the water and turn your tap on hot. Take the wet yarn out of the sink/bowl (to avoid felting) and fill it back up with HOT water. Place the wet skein in the water (if you're a fan of SOAK or Euclan, now is the time to put it in the water) and set a timer (hopefully one that you hear, unlike my very polite microwave timer that I often can't) for 25 minutes.

Now go about your business for 25 minutes (do the dishes perhaps?). When you come back the water in your sink will be cooled and probably a pretty color (mine was sea foam green in this instance). Once your time is up, gently lift the yarn out of the water and squeeze (no twisting!) the excess water from the hank. Then lay a towel (I fold mine in half) on the floor and place the untwisted skein in the bottom most corners like so (helpful kitty optional):

Then fold the bottom of the towel onto the yarn...

And keep rolling until your towel looks like this and your yarn is safely tucked inside.
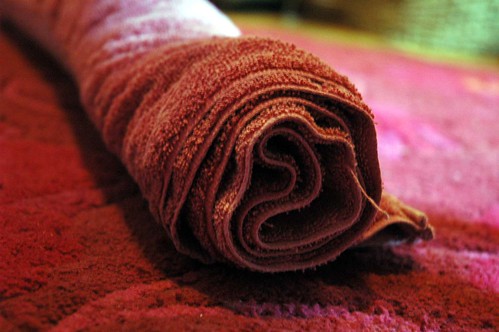
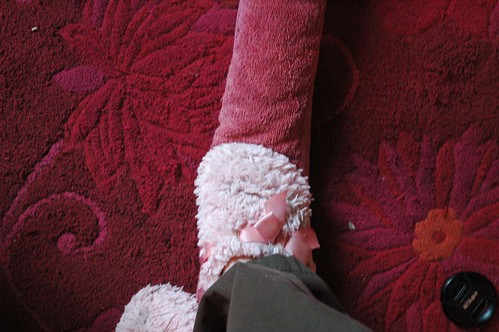
Now we're going to squeeze the rest of the moisture out of the yarn. You can kneel on this roll, sit on it... Or walk on it in your favorite pink slippers.
When you're finished playing circus tight rope walker, unroll the towel and take out your almost finished yarn! Now find two hangers (from experience, don't find these hangers in your honey's closet and leave the leather jacket that was hanging on one of said hangers on your dresser. Because then the cat will knock the leather jacket on the floor and you'll have an upset boyfriend.) and a place in which to hang them. Place one end of the yarn on one hanger and hang it, then fold up that wet towel and place it in the other hanger at the bottom of the skein.

Let the skein dry completely before taking it off the hangers. And enjoy your beautifully set new yarn!

7 comments:
What a great tutorial! Highly entertaining too. I think this may have been your best writing so far.
You kept me interested even though there is virtually no chance I will be making my own yarn.
As a new spinner, this was very informative and the pictures were great. I have enjoyed your blog and spinning your fiber. I have Hooville on my wheel right now. Loving it. I would love to be on your list for the next fiber club or if you have any leftover, think of me.
Lisa Sasser (aka dixiedean on ravelry)
P O Box 667
Perkins, OK 74059
ads@thejournalok.com
Brie, this is awesome!!!!!! Thank you so much, you talented and gorgeous woman you!
That was very helpful! Mark made me a niddy noddy out of PVC pipe (he's handy like that) and was going to try setting yarn with it, but I wonder if this would be easier.
I also enjoyed getting to see the progression of my new lovely that is on its way to me. Eeeekkk!
That's a great tutorial. I was told the basics and allowed to run with it, but never really shown. This is perfect!
Thank you, Brie!!
I love that you roll your yarn up in a towel and walk on it too! I do this and my friends have made fun of me for it. I'm also a fan of the 2 hangers + wet towel technique. Great tutorial! <3
Awesome! Tutorials seem to be a big hit! I feel very informed now. (ps love you!)
Post a Comment