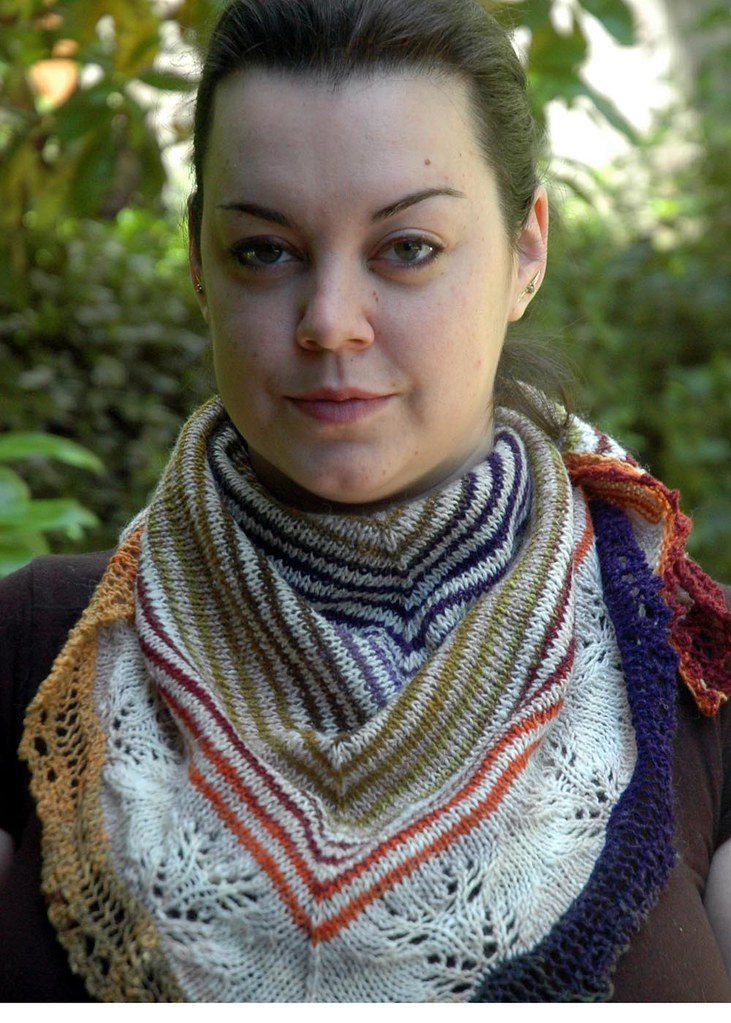
How do you turn a fresh off the needles project into wearable art? Block it.
For this tutorial post we're using my latest project (a Christmas present for someone special, providing I'm able to give it up!). The pattern is from Through the Loops and it's called Andrea's Shawl. I used Noro Silk Garden Sock yarn in two colorways and size 6 needles and I love the way it turned out. No question about it, this is one of my favorite patterns/projects to date.
Binding off the last stitch on a project like a shawl isn't the end of the process. As you can see in the before photo, the stitches can be uneven and the lace undefined. This happens during knitting for various reasons including uneven tension, snagged stitches, and tight knitting. Blocking your project will even out the imperfections and tug your stitches to the desired size. The process of blocking starts with a basin of lukewarm water and some wool wash (optional but it makes it smell nice!).
Fill your basin (in this case I used my bathroom sink) with lukewarm water before adding the wool wash of your choice (I like SOAK, soon to be carried at Fall Creek Fibers!) and agitate gently to avoid massive bubble explosions. Then carefully add your finished project to the soapy water, gently squeezing out any air bubbles that may be trapped in the folds. It's important not to be too vigorous with your squeezing, as this can felt your project if you're not careful. Our goal is to loosen up the wool and stitches, not to wash the shawl. As you can see, all of the dirt and oils that have gathered in your piece should float into the water, oftentimes the yarn color will bleed a bit as well... Don't worry.
Now set your timer to 25-30 minutes and take your dog for a walk or search your house for a cat free zone for blocking.
After your dog has been walked, gently pull the plug on your basin (or pour out the water) and then lift the shawl gently and lay flat (or folded over in my case of too small towels) and roll the towel around the wet project (remember this technique from the setting the twist tutorial?) then step on it, lay on it, kneel on it, sit on it to squeeze the water out of the shawl and into the towel.
The blocking set up should be in a place away from direct sun, drafts, and meddling kitten paws. My little set up is on the bedroom floor with mats similar to these and a towel laid over them. Before the blocking mats came into my life I used our futon. Not kitty free but easy to stick pins in. You can also use a thick blanket or multiple towels laid on the floor.
This is my favorite step... Experimenting. There are often many different ways to block a shawl and I like to start by laying the shawl flat to see it's natural shape. Since the wool is still damp it is quite sticky and easy to manipulate. I decided to go with what the wool wanted and do a scalloped edge in line with the leafy lace.
This is the not so fun part. People have different techniques for this part, but I started by pinning every tiny picot edge at the top of the shawl in a straight line. This took some time and adjusting but it was completely worth it in the end. Then I pinned the bottom peak into place, then the sides. I used the same stainless steel pins used for quilting for this part, but blocking wires would work as well for straight edges. This pinning part is an intuitive thing and when it comes down to it, there's no right way except the way that feels right to you.
The only thing left to do is wait (and you may want to mention to your boyfriend to make sure to turn on the light before stepping in the bedroom because there are pins in the floor... Live and learn.) and close the door. Make sure the item is completely dry before removing the pins.
Once the shawl is dry, take your finished measurements. In my case the shawl grew from 35 inches to 45 inches across the top, and from 20 to 25 inches from the center top to the bottom point. Completely worth the extra time to pin every edge. Now there's nothing left to do except enjoy your new piece.
Wearable art.


3 comments:
Beeootiful! I'm so ready to be done with the shawl that I'm working on.
Love the tutorials! This shawl is stunning.
Post a Comment